ADVERTISEMENT
Tropical Paradise in Every Slice
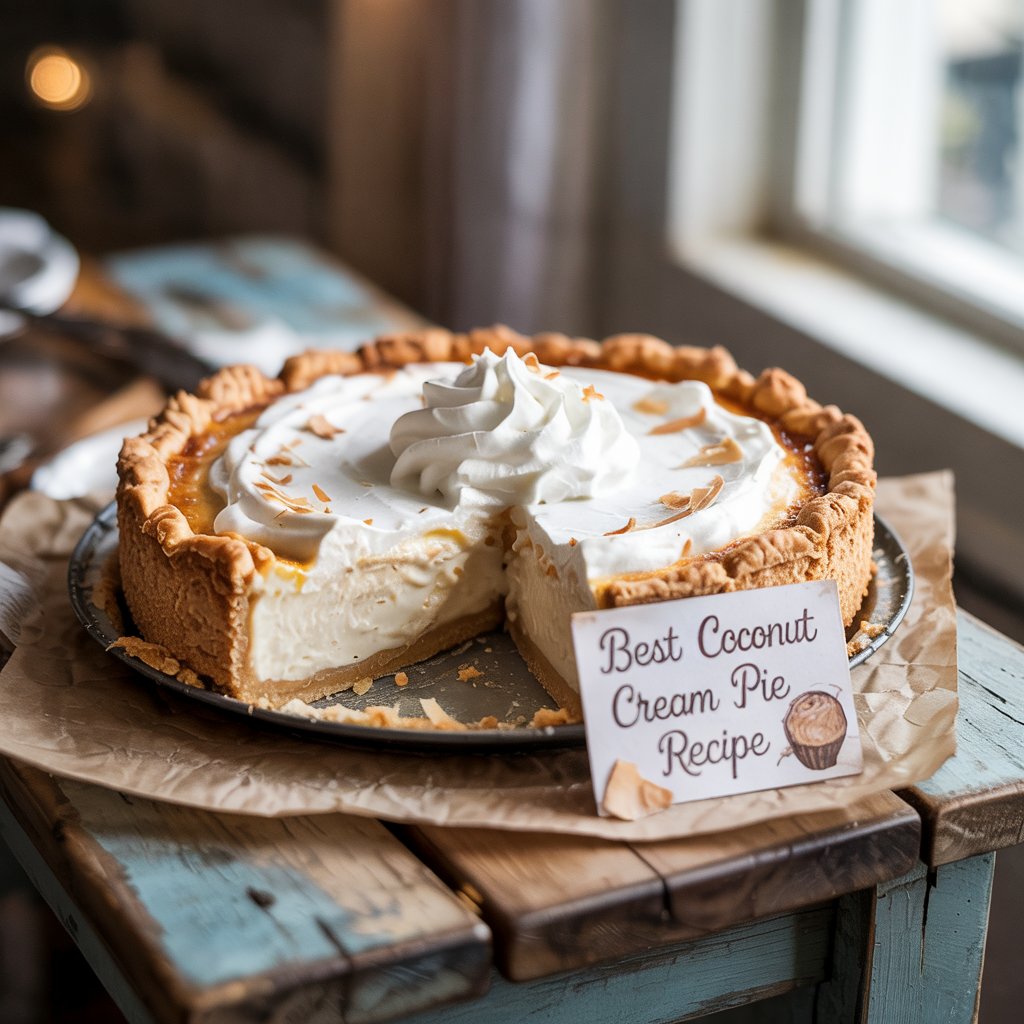
Coconut cream pie genuinely represents classic American diner dessert at its finest. This luscious pie features rich coconut custard filling topped with billowy whipped cream and toasted coconut flakes. The combination of creamy texture and tropical coconut flavor creates irresistible dessert that transports you to paradise with every bite. Whether served at holiday gatherings or weekend dinners, coconut cream pie genuinely satisfies coconut lovers and converts skeptics with its silky smooth filling and buttery crust.
What Makes Perfect Coconut Cream Pie
Perfect coconut cream pie genuinely balances three essential elements. The crust must be fully baked and crisp to support the creamy filling. The coconut custard needs proper thickness—not too runny or too stiff—with pronounced coconut flavor throughout. Finally, the whipped cream topping should be stable and not too sweet, allowing the coconut flavor to shine. Getting all three components right genuinely creates restaurant-quality pie at home.
Classic Coconut Cream Pie
Prep Time: 25 Minutes Cook Time: 30 Minutes Chill Time: 4 Hours Serves: 8This classic recipe genuinely delivers creamy coconut custard in a flaky crust, topped with whipped cream and toasted coconut. Every slice showcases professional bakery quality.
ADVERTISEMENT
Pie Crust Ingredients:
- 1 9-inch pie crust (homemade or store-bought)
Coconut Filling Ingredients:
- 2/3 cup granulated sugar
- 1/4 cup cornstarch
- 1/4 teaspoon salt
- 2 cups whole milk
- 1 cup canned coconut milk (full-fat)
- 4 large egg yolks
- 2 tablespoons unsalted butter
- 1 teaspoon vanilla extract
- 1/2 teaspoon coconut extract
- 1 cup sweetened shredded coconut
Whipped Cream Topping:
- 1 1/2 cups heavy whipping cream (cold)
- 3 tablespoons powdered sugar
- 1/2 teaspoon vanilla extract
- 1/4 cup toasted coconut flakes for garnish
Step-by-Step Instructions:
Prepare the Crust:
- Preheat oven to 375°F (190°C).
- Roll out pie dough and fit into 9-inch pie plate.
- Trim and crimp edges decoratively.
- Line with parchment paper and fill with pie weights.
- Blind bake for 15 minutes.
- Remove weights and parchment, bake 10-12 more minutes until golden.
- Cool completely while preparing filling.
Toast the Coconut:
- Spread 1/4 cup coconut flakes on baking sheet.
- Toast at 350°F for 5-7 minutes, stirring once, until golden.
- Watch carefully to prevent burning.
- Set aside for garnish.
Make the Coconut Filling:
- In a medium saucepan, whisk together sugar, cornstarch, and salt.
- In a separate bowl, whisk together whole milk, coconut milk, and egg yolks.
- Gradually pour milk mixture into dry ingredients, whisking constantly.
- Place saucepan over medium heat.
- Cook, stirring constantly with a whisk, for 8-10 minutes.
- The mixture will thicken and begin to bubble.
- Continue cooking and whisking vigorously for 2 more minutes after bubbling begins.
- Remove from heat.
- Stir in butter, vanilla extract, and coconut extract until butter melts.
- Fold in 1 cup sweetened shredded coconut.
- Pour hot filling into cooled pie crust.
- Press plastic wrap directly onto surface to prevent skin from forming.
- Refrigerate for at least 4 hours or overnight until completely set.
Make the Whipped Cream:
- When pie is fully chilled, make whipped cream.
- In a large bowl or stand mixer, beat cold heavy cream on high speed.
- When cream begins to thicken, add powdered sugar and vanilla.
- Continue beating until stiff peaks form.
- Don’t overbeat or cream will turn to butter.
Assemble and Serve:
- Remove plastic wrap from chilled pie.
- Spread or pipe whipped cream over coconut filling.
- Garnish with toasted coconut flakes.
- Serve immediately or refrigerate up to 4 hours.
- Store any leftovers covered in refrigerator.
Chef’s Note: The plastic wrap touching the filling surface genuinely prevents that rubbery skin from forming on top. For more coconut pie variations, Sally’s Baking Addiction offers excellent recipes.
Mastering the Coconut Custard
The custard filling genuinely makes or breaks coconut cream pie. These techniques ensure smooth, perfectly thickened filling every time.
Tempering Egg Yolks
Combining milk mixture with dry ingredients before heating genuinely prevents lumps more effectively than traditional tempering. This method streamlines the process while ensuring smooth results. Whisk constantly while cooking to prevent scorching on the bottom of the pan.
Cooking to Perfect Thickness
The custard must reach full boil to activate cornstarch completely. When bubbles break the surface, cook for exactly 2 more minutes while whisking vigorously. Undercooking creates runny filling that won’t slice cleanly. Overcooking makes it too thick and gummy. Watch timing carefully for best results.
Using Both Extracts
Vanilla extract provides classic flavor while coconut extract intensifies the tropical taste. The combination genuinely creates more pronounced coconut flavor than using coconut alone. Start with 1/2 teaspoon coconut extract—you can always add more if desired, but too much tastes artificial.
Preventing Skin Formation
Pressing plastic wrap directly onto hot filling genuinely prevents that tough skin from forming on top. Make sure the plastic touches the entire surface with no air pockets. This simple step ensures perfectly smooth filling when you remove the wrap for assembly.
Coconut Selection Guide
Sweetened vs. Unsweetened Coconut
Sweetened shredded coconut genuinely works best for the filling. The sugar keeps it moist and tender, preventing dry, chewy bits in the creamy custard. Unsweetened coconut is too dry and adds less flavor. Save unsweetened coconut for toasting as garnish if you prefer less sweetness on top.
Coconut Milk Options
Full-fat canned coconut milk creates richest flavor and texture. Don’t substitute light coconut milk or coconut milk beverage—they’re too watery. The thick, creamy canned variety genuinely provides authentic coconut taste. Shake the can well before opening to mix the cream and liquid.
Toasting Coconut Properly
Toasted coconut genuinely adds nutty depth and beautiful appearance. Spread in single layer on baking sheet and watch carefully—it burns quickly. Stir every 2 minutes for even browning. Remove when golden, as it continues darkening slightly from residual heat. Toast extra for snacking—it’s addictive.
Coconut Flakes vs. Shredded
Sweetened shredded coconut works in the filling, while larger coconut flakes make better garnish. The flakes genuinely provide more dramatic presentation when toasted. Use shredded coconut if flakes aren’t available—the taste remains excellent even if the appearance differs slightly.
Expert Tips for Success
The filling must be completely cold and set before topping with whipped cream. Warm filling genuinely melts whipped cream and creates soupy mess. Plan ahead and chill pie overnight for best results. If rushed, refrigerate for minimum 4 hours before topping. For timing guidance, Tastes Better From Scratch provides helpful tips.
Add 1 tablespoon of instant vanilla pudding mix to cream before whipping for more stable topping. This genuinely prevents weeping and maintains fluffy texture longer. Alternatively, use 1/2 teaspoon unflavored gelatin dissolved in 1 tablespoon warm water. These stabilizers help whipped cream hold up for 24+ hours.
Heavy whipping cream genuinely whips to greater volume when very cold and fresh. Check expiration date when buying. Place bowl and beaters in freezer for 10 minutes before whipping. The cold equipment helps cream reach stiff peaks faster with better texture.
Blind baking until completely golden brown genuinely prevents soggy crust. The crust should be fully cooked, not just lightly colored. Additionally, cooling crust completely before adding warm filling helps maintain crispness. A fully baked crust stands up better to creamy filling over time.
Dip knife in hot water and wipe dry between cuts. The warm blade genuinely glides through whipped cream without dragging or compressing. Make one smooth cut rather than sawing motion. Clean knife after every slice for professional-looking portions that showcase all three layers beautifully.
Delicious Variations
Coconut Meringue Pie
Top with meringue instead of whipped cream for classic diner style. Beat 5 egg whites with 1/2 cup sugar and 1/2 teaspoon cream of tartar until stiff peaks form. Spread over warm filling, sealing to crust edges. Bake at 350°F for 12-15 minutes until golden. This genuinely creates impressive showstopper dessert.
Chocolate Coconut Cream Pie
Add 2 ounces melted dark chocolate to finished custard before pouring into crust. Swirl gently with a knife for marbled effect or mix completely for chocolate-coconut fusion. Garnish with chocolate shavings along with toasted coconut. The combination genuinely tastes like Mounds candy bar in pie form.
Toasted Almond Coconut Pie
Add 1/2 teaspoon almond extract to filling along with vanilla. Top with mixture of toasted coconut and toasted sliced almonds. The almond flavor genuinely complements coconut beautifully, creating sophisticated variation. Use Amaretto instead of almond extract for adult version.
Lime Coconut Cream Pie
Add 1 tablespoon fresh lime zest and 2 tablespoons lime juice to custard. The citrus genuinely brightens coconut flavor and creates tropical variation reminiscent of Key lime pie. Garnish with lime zest curls for beautiful presentation that hints at the flavor within.
Banana Coconut Cream Pie
Layer sliced bananas in bottom of baked crust before adding coconut filling. Use 2-3 ripe but firm bananas, sliced 1/4-inch thick. The combination genuinely creates tropical paradise in every bite. Prevent banana browning by tossing slices with lemon juice before layering.
Make-Ahead Instructions
Preparing Components Separately
Blind bake pie crust up to 2 days ahead. Store at room temperature tightly covered. Make custard filling up to 1 day ahead and refrigerate in airtight container. Pour into crust and top with fresh whipped cream the day of serving. This approach genuinely makes entertaining easier while maintaining quality.
Fully Assembled Pie Storage
Complete coconut cream pie keeps refrigerated for 2-3 days when topped with stabilized whipped cream. Without stabilizer, add whipped cream no more than 4 hours before serving. Cover loosely with plastic wrap or use cake dome to protect delicate topping. The pie genuinely tastes best within 24 hours of assembly.
Freezing Considerations
Coconut cream pie doesn’t freeze well due to dairy-based custard and whipped cream topping. The texture becomes watery and grainy when thawed. If you must freeze, freeze only the baked crust and prepare filling fresh when needed. This genuinely produces better results than freezing complete pie.
Serving and Presentation
Garnishing Ideas
Toast coconut flakes until golden and sprinkle generously over whipped cream. Add white chocolate shavings for elegant touch. Fresh mint leaves provide color contrast. For special occasions, pipe whipped cream with star tip for professional appearance. These simple garnishes genuinely elevate presentation dramatically.
Portion Sizes
This rich pie serves 8 generous slices. Cut into 10 smaller portions if serving after large meal. Use sharp knife dipped in hot water for clean cuts. Wipe knife between slices to maintain neat appearance. Serve on chilled dessert plates to keep pie cold longer.
Pairing Suggestions
Coconut cream pie genuinely pairs well with strong coffee or hot tea. The bitter notes balance the sweet, creamy pie. For dessert wine pairing, try sweet Riesling or Moscato. The fruity sweetness complements coconut flavor without overwhelming. Avoid serving with other coconut desserts—let this pie shine as the star.
Special Occasion Variations
Make individual coconut cream tarts in 4-inch tart pans for elegant presentation. These serve one person each and look impressive on dessert tables. Alternatively, use parfait glasses to layer crust crumbs, filling, and whipped cream for deconstructed version. Individual servings genuinely work well for parties and buffets.
Troubleshooting Common Issues
Filling is too runny
Undercooking prevents cornstarch from thickening properly. The mixture must reach full boil and cook for exactly 2 minutes after bubbling begins. If filling is already made and too thin, return to saucepan and cook longer while whisking constantly. Old cornstarch also loses thickening power—check expiration date.
Filling is lumpy
Not whisking constantly during cooking causes lumps. The custard needs constant attention to prevent lumps from forming. If lumps appear, strain filling through fine-mesh sieve before pouring into crust. This genuinely salvages the texture. Prevention works better—never stop whisking while custard cooks.
Whipped cream deflated
Overbeating cream past stiff peaks causes it to separate and deflate. Stop beating as soon as stiff peaks form. If cream starts looking grainy, you’ve gone too far. Unfortunately, overbeaten cream can’t be fixed—start over with fresh cream. Watch carefully to catch perfect moment.
Crust is soggy
Insufficient blind baking or adding filling while crust is still warm causes sogginess. The crust must be completely golden brown and fully cooled. If problem persists, brush baked crust with beaten egg white and bake 2-3 minutes more. This creates moisture barrier that genuinely keeps crust crisp longer.
Coconut tastes stale
Old coconut loses flavor and develops off taste. Check expiration date and smell before using—fresh coconut has pleasant aroma. Store opened coconut in refrigerator or freezer to maintain freshness. Toasting old coconut can’t fix stale flavor, so always use fresh for best results.
Frequently Asked Questions
Can I use coconut cream instead of coconut milk?
Coconut cream is thicker and richer than coconut milk. You can use it, but the filling will be even richer. Alternatively, mix coconut cream with equal parts whole milk to approximate coconut milk consistency. The flavor genuinely intensifies with coconut cream—delicious for coconut lovers.
What’s the difference between coconut cream pie and coconut custard pie?
Coconut cream pie features stovetop custard filling topped with whipped cream. Coconut custard pie mixes eggs with coconut and milk, then bakes directly in crust without stovetop cooking. Cream pie genuinely has lighter, more pudding-like texture while custard pie resembles dense chess pie.
How do I know when custard is thick enough?
The custard should coat the back of a spoon thickly. When you draw your finger through the coating, it should leave a clean line. The mixture will bubble and look very thick in the pan. Remember it thickens more as it cools, so don’t overcook or it becomes too firm.
Can I make this dairy-free?
Replace whole milk with additional coconut milk and use vegan butter. For whipped topping, use chilled full-fat coconut cream whipped with powdered sugar. Refrigerate can of coconut cream overnight, then whip only the thick cream that separates on top. The results genuinely approximate traditional version well.
Why did my pie weep?
Weeping—liquid pooling in the pie—occurs when proteins in eggs tighten too much from overcooking. Cook custard only until it reaches proper thickness. Additionally, dramatic temperature changes cause weeping. Let pie come to room temperature gradually rather than placing hot pie directly in cold refrigerator.